Mastering Acrylic Laser Cutting for Beginners

Mastering Acrylic Laser Cutting for Beginners

INDUSTRIAL NEWS

Mastering Acrylic Laser Cutting for Beginners

Acrylic laser cutting is an increasingly popular method for crafting precise, clean designs for everything from signage to artistic projects. This guide will take you through the basics, helping beginners master the skills required to work with acrylic using a CO2 laser machine.

What Is Acrylic Laser Cutting?

Acrylic laser cutting is the process of using a CO2 laser machine to cut or engrave acrylic sheets. It is highly favored because it allows for precision, clean cuts, and the ability to create intricate designs that would be difficult with traditional cutting methods. Acrylic is a thermoplastic, and its smooth cutting and engraving properties make it ideal for various applications in industries such as advertising, crafting, and even prototyping.

Choosing the Right CO2 Laser Machine

When working with acrylic, selecting the right CO2 laser machine is crucial. Some factors to consider:

  • Power Level: CO2 laser machines come with different power outputs, typically ranging from 80W to 300W. For most acrylic projects, a 100W laser provides a good balance of precision and cutting speed. Higher power levels, such as the ones offered by MYounglaser, are ideal for thicker acrylic sheets.
  • Cutting Speed: Machines with faster speeds, like the Dura series offered by MYounglaser, ensure quicker operations without sacrificing precision.
  • Work Area: The size of the work area matters if you’re working on larger acrylic projects. A larger work bed allows you to handle bigger sheets of acrylic without constantly repositioning the material.
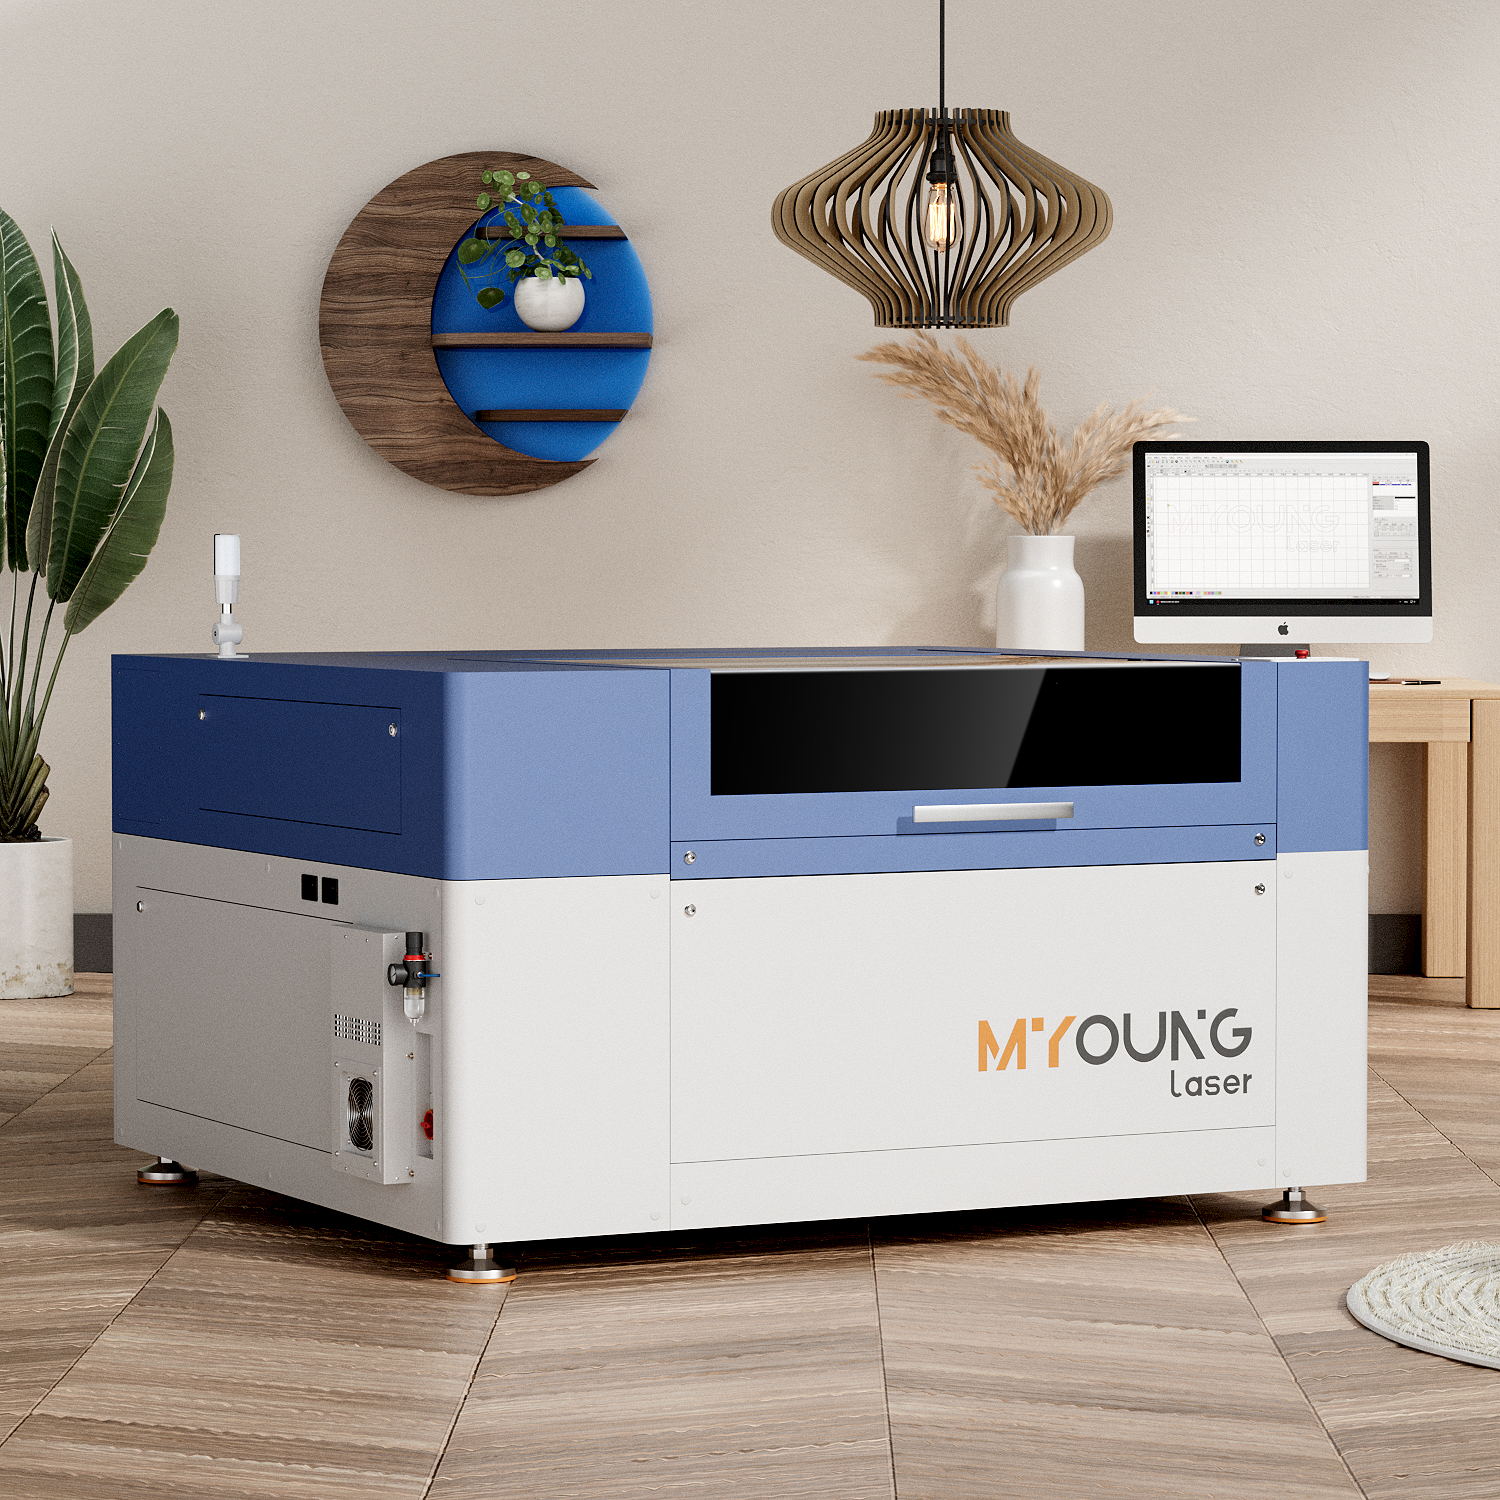
co2 laser cutting machine

Step 1: Choose the Right Acrylic Type

Acrylic comes in two main types: cast acrylic and extruded acrylic. Understanding the difference is crucial because they react differently to laser cutting:

  • Cast Acrylic: Produces a frosted look when engraved, making it ideal for signage or decorative items.
  • Extruded Acrylic: It cuts more cleanly but does not engrave as well. It’s ideal for cutting jobs that require a polished finish.

It’s also important to choose the right thickness. Thicker acrylic requires higher power, while thinner acrylic can be cut at lower settings.


Step 2: Optimize Machine Settings (Power, Speed, Focus)

Power and speed settings directly influence the quality of your cut. Here’s how to adjust these:

  • Power: Higher power levels are required for thicker acrylic (e.g., 10mm or more), while lower power works for thin sheets (e.g., 2-5mm). Avoid excessive power to prevent burns and melting at the edges.
  • Speed: Faster speeds reduce the chance of overheating, but be careful not to go too fast, as this can lead to incomplete cuts. Test your speed and power on a small scrap piece to fine-tune the settings.
  • Focus: Proper focus is critical for a clean cut. Ensure that the laser is focused directly on the material surface. Most MYounglaser CO2 machines come with automatic focusing systems, ensuring accurate cuts.

Step 3: Adjust Design Files for Laser Cutting

Prepare your design in software compatible with your laser cutter, such as Lightburn or CorelDRAW. Some tips:

  • Vector Files: Ensure that your design is in a vector format (e.g., SVG, AI, DXF) for precise cutting.
  • Kerf Adjustment: The kerf is the width of the laser beam that removes material during the cut. It’s essential to account for the kerf, especially for interlocking designs. Common kerf widths for acrylic are between 0.1mm and 0.2mm, depending on the machine’s power settings.
  • Layering and Engraving: Set different layers in your design for engraving and cutting, so the machine knows when to cut through and when to engrave the surface.

Step 4: Test Cut Settings

Before diving into your project, always test your settings on a small scrap piece of acrylic. Things to observe during your test cut:

  • Edge Quality: Ensure that there are no burnt or melted edges.
  • Cutting Depth: Verify that the laser cuts all the way through without leaving uncut areas.

Running a test helps prevent errors and material waste when working on larger projects.


Step 5: Maintain Proper Ventilation

Acrylic emits fumes when cut with a laser, which can be harmful. Proper ventilation and extraction systems are vital. Always ensure:

  • Fume Extractor: Use a fume extractor or external exhaust system to remove harmful particles and gases.
  • Air Assist: If your machine has an air assist feature, use it to blow away debris and prevent flare-ups during cutting. This results in smoother cuts and longer-lasting acrylic.

Step 6: Cutting and Engraving Techniques

  • Engraving: For engraving acrylic, slower speeds and lower power settings will give you more control and depth in your designs. Cast acrylic tends to create better engraving results than extruded acrylic, offering a frosted finish.
  • Cutting: Once you’ve found the right speed and power settings, initiate the cutting process. With MYounglaser Dura series machines, you can reach cutting speeds of up to 1200mm/s with smooth precision, thanks to advanced motors and guides.

Step 7: Cleaning and Post-Processing

After cutting:

  • Clean the Edges: Use isopropyl alcohol or a gentle detergent to clean acrylic edges and remove any burn marks. Acrylic sheets may have slight discoloration, which can be removed with a soft cloth and cleaning agent.
  • Polishing: For a polished, glass-like edge finish, use a flame polisher or carefully apply heat with a torch.

Step 8: Troubleshooting

Common issues and solutions:

  • Burn Marks: Occur when the laser power is too high. Reduce the power or increase cutting speed.
  • Melting Edges: Usually caused by using the wrong type of acrylic or incorrect speed settings. Switch to cast acrylic for better results and adjust the power settings.
  • Incomplete Cuts: Occurs when the laser doesn’t cut through the material completely. Reduce speed or increase the laser power.

Why MYounglaser CO2 Machines are Ideal for Acrylic Cutting

MYounglaser CO2 laser machines offer advanced features that make acrylic cutting and engraving much easier for beginners and professionals alike:

  • High Precision Motors: Equipped with Japan Shinano motors for high torque and smooth operation.
  • Automatic Focus System: Ensures that the laser is always correctly focused for each project.
  • Power Options: Machines range from 80W to 300W, making them suitable for various thicknesses of acrylic.
  • Enhanced Ventilation: Built-in fume extractors ensure a safe working environment.

Whether you’re working on artistic projects or industrial applications, MYounglaser offers reliability and quality for acrylic cutting.

co2 laser cutting machine

Common Mistakes and Troubleshooting

  • Incorrect Power Settings: Using too much power can lead to burnt edges. Always test your settings on a small piece of acrylic before cutting a large project.
  • Not Accounting for Kerf: The width of the laser beam (kerf) can slightly alter the size of the final cut piece. Always account for the kerf when preparing your designs.

Why Choose MYounglaser CO2 Machines for Acrylic Cutting?

For beginners looking for reliable, high-performance machines, MYounglaser offers some of the best CO2 laser machines on the market. Their machines are equipped with:

  • Japan Shinano motors for high precision
  • Self-cleaning linear rails to ensure smooth operation
  • Built-in water chiller and fume extractor, making them user-friendly and safe
  • Wide range of power options to handle various thicknesses of acrylic

By following these guidelines and using the right equipment, you’ll be on your way to mastering acrylic laser cutting in no time.

Explore our full range of MYounglaser CO2 laser machines and see how they can help you bring your acrylic cutting projects to life. Visit our website or contact us for more information!

Choosing the Right Thickness for Acrylic Laser Cutting

Choosing the Right Thickness for Acrylic Laser Cutting

INDUSTRIAL NEWS

Choosing the Right Thickness for Acrylic Laser Cutting

Acrylic is one of the most popular materials for CO2 laser cutting, offering high precision and excellent results in various industries, including signage, decorative items, and industrial components. Choosing the right thickness for acrylic laser cutting is crucial in achieving the best results, and it depends on a few key factors, such as the laser machine’s power, the project’s design complexity, and the material’s intended application.

Factors to Consider When Choosing Acrylic Thickness

Laser Power: The power of your CO2 laser machine significantly impacts the thickness of acrylic you can cut. For instance, a MYounglaser CO2 laser machine with a higher wattage can cut through thicker acrylic more effectively. Machines ranging from 80W to 300W are ideal for different thicknesses. For example:

80W CO2 laser: Suitable for cutting acrylic up to 10mm thick.

150W CO2 laser: Can handle acrylic up to 20mm thick.

300W CO2 laser: Can cut acrylic up to 30mm thick.

Application: The intended use of the acrylic part also plays a role in determining the thickness. Thicker acrylic sheets (8mm and above) are used for structural or heavy-duty applications, such as industrial components, while thinner sheets (3mm to 6mm) are perfect for signage and intricate designs where detail is essential.

Complexity of Design: For more intricate designs, thinner acrylic is recommended as it allows for higher precision and smoother edges. Thicker acrylic tends to melt at the edges with complex cuts, especially with lower-powered lasers.

co2 laser cutting machine

Benefits of Choosing the Right Thickness

  • Efficient Cutting: Properly matching acrylic thickness with your CO2 laser machine ensures faster cutting speeds and prevents unnecessary material wastage.
  • Edge Finish Quality: Thinner acrylic often results in cleaner and more polished edges, especially with advanced laser machines like the MYounglaser CO2 laser engravers.
  • Project Cost Efficiency: Choosing the appropriate thickness helps balance the cost of materials with the performance of your machine, preventing overuse of energy or time-consuming processes.
co2 laser cutting machine

Recommended Acrylic Thickness for Common Applications

  • Signage and Displays: 3mm to 5mm thickness is ideal for signage as it provides a good balance between durability and precision.
  • Decorative Items: For intricate patterns, 2mm to 6mm is perfect for creating laser-cut art, jewelry, and other small decorative pieces.
  • Industrial Components: For load-bearing or structural components, opt for thicker acrylic sheets between 10mm to 20mm, cut with higher-powered lasers like the MYounglaser 300W CO2 laser machine.

Choosing the Right Machine: The MYounglaser Advantage

MYounglaser CO2 laser machines are versatile and designed to handle various acrylic thicknesses. Whether you are working with thin, intricate designs or thick, durable components, the machines’ precision and efficiency allow you to achieve professional-grade results every time.

co2 laser machine manufacturers

Advantages of MYounglaser Machines:

  1. High Precision: The machines come equipped with advanced control systems, ensuring precise cuts on both thick and thin acrylic sheets.
  2. Versatility: From signage to industrial parts, MYounglaser’s CO2 laser machines cater to a wide range of applications, with laser powers ranging from 80W to 300W.
  3. Durability: Designed to withstand heavy usage, MYounglaser machines offer a long lifespan and minimal maintenance requirements, making them ideal for businesses focusing on acrylic products.

Selecting the right acrylic thickness for your laser cutting project involves understanding your machine’s capabilities, the application, and the design complexity. With MYounglaser’s advanced CO2 laser machines, you can confidently tackle any acrylic cutting project, from intricate designs to robust industrial components.

The Science Behind Acrylic CO2 Laser Cutting

The Science Behind Acrylic CO2 Laser Cutting

INDUSTRIAL NEWS

The Science Behind Acrylic CO2 Laser Cutting

Acrylic CO2 laser cutting has become a go-to method for precision and efficiency in various industries. From crafting intricate designs to producing high-quality, smooth finishes, CO2 laser machines offer significant advantages when cutting acrylic materials. In this article, we’ll explore the science that makes this process effective, from how laser beams interact with acrylic to the precise technology behind CO2 lasers.

How CO2 Lasers Work in Acrylic Cutting

At the heart of CO2 laser machines is a laser beam generated through an electrically stimulated mixture of gases, including carbon dioxide (CO2). The laser produces a high-powered, invisible infrared light (with a wavelength of 10.6 micrometers) that can easily be absorbed by non-metallic materials like acrylic. The concentrated light beam is directed through a series of lenses to focus on the work surface, which is acrylic in this case.

Once the laser beam comes in contact with the material, it heats the acrylic to a point where it melts or vaporizes, allowing for a clean, precise cut. The cutting process involves localized heat, which minimizes damage to surrounding material, giving CO2 laser machines an edge in fine-detail cutting.

China co2 laser engraving machine

Why Acrylic is Ideal for CO2 Laser Cutting

Acrylic (also known as PMMA) is an ideal material for CO2 laser cutting for several reasons:

  • Transparency to Visible Light: Acrylic’s transparency allows it to interact efficiently with the infrared wavelengths of the CO2 laser.
  • Thermal Reaction: When the high-energy laser beam interacts with acrylic, the heat causes localized melting, which can be controlled for precision cutting or engraving.
  • Clean Edges: Due to the heat generated, acrylic edges often seal during the cutting process, producing smooth and polished edges without the need for post-processing.

Benefits of Using CO2 Laser Machines for Acrylic

  1. Precision Cutting: CO2 laser machines like those from MYounglaser provide exceptional precision, making them ideal for industries that require intricate and detailed designs in acrylic products.
  2. High Speed: The laser can quickly vaporize acrylic, making it efficient for both small-scale and large-scale production.
  3. No Tool Wear: Since the process is non-contact, there is no physical wear on tools or blades, reducing maintenance costs over time.
  4. Versatile Thickness Cutting: Whether cutting thin acrylic sheets or thicker materials, CO2 lasers can adjust power and speed to handle a range of material thicknesses.
CO2 laser machine suppliers

How Laser Parameters Affect Acrylic Cutting

For optimal results in acrylic cutting, it’s essential to fine-tune the parameters of the CO2 laser machine:

  • Laser Power: The power level (measured in watts) determines the depth of the cut. Higher power is typically used for thicker acrylic sheets.
  • Cutting Speed: This refers to the speed at which the laser moves across the material. A slower speed allows the laser to cut deeper, but faster speeds increase productivity.
  • Air Assist: The use of compressed air or gas during the cutting process helps to remove melted acrylic from the cut line, improving precision and reducing the chance of scorching the edges.
  • Focus Distance: The focal point of the laser must be properly adjusted based on the acrylic’s thickness. A well-calibrated focus ensures that the laser’s energy is concentrated exactly where it’s needed.

Choosing the Right Machine for Acrylic Laser Cutting

When selecting the right acrylic CO2 laser cutting machine, it’s important to consider factors like power, cutting area, and additional features. For example, the MYounglaser CO2 laser machines are known for their high-quality performance and durability. As CO2 laser machine suppliers, MYounglaser provides a range of models suitable for different production needs, from hobbyists to industrial-scale manufacturers.

understanding the science behind how CO2 lasers work with acrylic can help optimize cutting efficiency and output quality. With the right machine settings and materials, acrylic CO2 laser cutting can deliver superior results for a wide array of applications, from signage and displays to decorative elements.

What Makes Acrylic an Ideal Material for CO2 Laser Cutting?

What Makes Acrylic an Ideal Material for CO2 Laser Cutting?

INDUSTRIAL NEWS

What Makes Acrylic an Ideal Material for CO2 Laser Cutting?

Acrylic is a popular material widely used in various industries, from signage and displays to home décor and manufacturing, and it is especially suitable for CO2 laser cutting. In this article, we’ll explore the key reasons why acrylic stands out as an excellent material for laser cutting and engraving, particularly with CO2 laser machines from MYounglaser. Whether you’re in the market for acrylic CO2 laser cutting machines or working with CO2 laser machine suppliers, this guide will help you understand the benefits of choosing acrylic.

1. Acrylic’s Laser-Friendly Properties

Acrylic is particularly responsive to laser technology, making it an ideal candidate for CO2 laser machines. When a laser beam interacts with acrylic, it cuts through the material cleanly and efficiently. This is largely due to the fact that acrylic absorbs the laser’s energy very effectively.

CO2 laser machines emit infrared light, which is perfectly suited to melt and vaporize acrylic, allowing precise cuts without damaging the surrounding material. Whether you’re working with MYounglaser equipment or machines from other CO2 laser machine suppliers, acrylic’s responsiveness ensures smooth, polished edges.

2. Excellent Edge Finish

One of the standout benefits of cutting acrylic with a CO2 laser machine is the high-quality edge finish. Unlike other materials that may require post-processing to remove rough or burned edges, acrylic maintains a clean, polished edge directly after the cut. This can significantly reduce production time and costs, making it a favorite among manufacturers.

For instance, MYounglaser machines can deliver crisp, clear, and aesthetically pleasing edges on both transparent and colored acrylic sheets, which is especially beneficial for industries like advertising and home décor.

China co2 laser engraving machine

3. Versatility in Design and Thickness

Acrylic is available in a range of colors, finishes, and thicknesses, making it extremely versatile. Whether you are cutting thin sheets for intricate designs or thicker ones for structural purposes, acrylic CO2 laser cutting machines can handle the task with precision.

CO2 lasers can easily cut acrylic sheets of various thicknesses. With the advanced capabilities of MYounglaser machines, you can process acrylic up to 40mm thick with smooth edges and precise detailing. This makes it ideal for a wide range of applications from fine decorative pieces to large, functional components.

4. Durability and Longevity

Acrylic is known for its durability, resistance to impact, and ability to withstand environmental factors like UV light and weather. Once laser-cut, acrylic retains these properties, ensuring that the finished product is not only precise but also long-lasting. This durability makes acrylic a top choice in the signage industry, where weather resistance is critical.

5. High Transparency and Optical Clarity

Clear acrylic offers high optical clarity, which is unmatched by many other materials. This makes it particularly suitable for displays, windows, and even lenses. A CO2 laser machine can cut clear acrylic without clouding or distorting the material, allowing for the creation of visually stunning products.

With MYounglaser’s CO2 machines, you can create custom pieces with unparalleled clarity, whether for commercial displays or art installations.

co2 laser cutting machine

6. Cost-Effective and Efficient

Acrylic is not only affordable compared to many other materials but also allows for efficient use when paired with CO2 laser machines. The precise nature of laser cutting ensures minimal material wastage, and the ability to produce large quantities of identical parts quickly makes it highly efficient for production.

7. Environmentally Friendly

Unlike many other plastics, acrylic is more eco-friendly as it can be recycled. The waste produced during the cutting process can be repurposed, reducing the environmental impact of large-scale manufacturing operations.

Acrylic’s unique properties – including its laser compatibility, excellent edge finish, versatility, and durability – make it an ideal material for use with CO2 laser machines. For anyone in need of CO2 laser machine suppliers or looking for advanced acrylic CO2 laser cutting machines, MYounglaser offers a range of solutions designed to maximize cutting efficiency and quality. Whether you are working on small intricate designs or large-scale industrial projects, acrylic is a material that ensures precision, beauty, and cost-effectiveness.

co2 laser machine manufacturers
Top Tips for Maximizing Efficiency in Acrylic Laser Cutting

Top Tips for Maximizing Efficiency in Acrylic Laser Cutting

INDUSTRIAL NEWS

Top Tips for Maximizing Efficiency in Acrylic Laser Cutting

Acrylic laser cutting is a popular method used for creating precise, intricate designs in various industries, from signage to decor. By optimizing your processes and equipment, like a CO2 laser machine, you can ensure maximum efficiency and exceptional results. This guide highlights key strategies to enhance your acrylic laser cutting experience.

1. Choose the Right CO2 Laser Machine

The first step to efficient cutting is choosing the right CO2 laser machine. Machines vary by power and features, so it’s essential to match your machine to the material thickness and complexity of your designs. For acrylic cutting, a machine with at least 150W is ideal for thicker materials, while 80W may suffice for thinner sheets.

  • Tip: When selecting a machine, consider reputable CO2 laser machine suppliers like MYounglaser that provide robust and reliable equipment. Ensure they offer models tailored specifically for acrylic cutting, as this ensures optimal performance.

2. Optimize Your Cutting Settings

Achieving clean and efficient cuts requires fine-tuning your machine settings. Factors like laser power, speed, and frequency play crucial roles in cutting through acrylic without burning or warping the material.

  • Tip: Use lower speeds and higher power for thick acrylic and increase the speed for thinner sheets. Conduct test runs on small sections to find the perfect balance.

3. Use High-Quality Acrylic Sheets

The quality of acrylic can directly impact cutting efficiency and results. Poor quality acrylic tends to have impurities, which can lead to uneven cuts or melted edges.

  • Tip: Opt for high-grade acrylic from trusted suppliers. Consistent, clear acrylic sheets allow for cleaner cuts and prevent potential issues during the cutting process.
China co2 laser engraving machine

4. Keep the Focus Lens Clean

Dirty or damaged focus lenses can affect the laser’s cutting ability, leading to inefficient processing and potential damage to the material.

  • Tip: Regularly inspect and clean your CO2 laser machine’s lenses and mirrors to maintain sharpness in the laser beam.

5. Minimize Waste with Smart Nesting

To maximize material usage and reduce waste, arrange your designs using nesting software. Nesting allows you to optimize the layout of your designs on the acrylic sheet, fitting as many parts as possible.

  • Tip: Use software to automatically calculate the best layout for cutting. This not only saves material but also reduces machine run-time, increasing overall efficiency.
II-VI CO2 Laser Focusing Lens

6. Air Assist System for Cleaner Cuts

An air assist system blows a stream of air directly onto the cutting area, helping to reduce heat and remove debris from the cutting path. This results in cleaner edges and faster cutting times.

  • Tip: Make sure your CO2 laser machine is equipped with a high-quality air assist system, or consider upgrading to enhance performance.

7. Regular Maintenance and Calibration

To keep your acrylic CO2 laser cutting machine running efficiently, schedule regular maintenance and calibrations. Proper maintenance ensures that all parts of the machine are functioning correctly and that cuts are precise.

  • Tip: Work with your machine supplier (like MYounglaser) for professional maintenance services or follow their guidelines for self-maintenance routines.

Maximizing the efficiency of your acrylic laser cutting process is all about proper machine selection, fine-tuning settings, and using high-quality materials. With the right CO2 laser machine from MYounglaser and smart operational techniques, you can achieve excellent results, reduce waste, and improve productivity.

By incorporating these tips into your workflow, you’ll ensure that your acrylic laser cutting projects are handled with precision and speed, making the most of your investment in CO2 laser technology.

co2 laser machine manufacturers
Step-by-Step Guide to Cutting Acrylic with a CO2 Laser

Step-by-Step Guide to Cutting Acrylic with a CO2 Laser

INDUSTRIAL NEWS

Step-by-Step Guide to Cutting Acrylic with a CO2 Laser

CO2 laser machines have become indispensable for precise acrylic cutting, whether for hobbyist projects or large-scale commercial applications. Using machines like those from MYounglaser, cutting acrylic can be efficient, accurate, and produce polished results. This guide provides a detailed, step-by-step process for cutting acrylic using a CO2 laser machine, ensuring you achieve stunning designs every time.

Step 1: Prepare Your Design File

Before you begin cutting, your first step is to create a design using vector-based software such as Adobe Illustrator, CorelDRAW, or AutoCAD. CO2 laser machines rely on vector files (e.g., .DXF, .AI, .SVG) to plot the cutting path. Ensure your design meets the following criteria:

  • Line thickness: Typically, laser cutting software interprets lines below 0.001 inches as cutting lines.
  • Closed paths: Ensure all paths in your design are closed to avoid incomplete cuts.
  • Layer differentiation: If your design requires engraving and cutting, set different layers and colors to designate which parts will be engraved versus cut.

Step 2: Choose the Right Acrylic Type and Thickness

Selecting the right acrylic for your project is crucial. There are two types of acrylic commonly used for laser cutting: cast acrylic and extruded acrylic.

  • Cast acrylic is ideal for laser cutting as it produces cleaner cuts and better edge finishes.
  • Extruded acrylic is cheaper but prone to producing burrs or melt marks due to its lower melting point.

Recommended Thicknesses for CO2 Laser Cutting:

  • 40W – 60W machines: Can cut up to 5mm thick acrylic sheets.
  • 80W – 150W machines: Handle sheets up to 10mm thick.
  • 200W and above: Can cut through sheets as thick as 20mm or more.

For most hobbyist projects, 3mm to 5mm thick cast acrylic is preferred due to its durability and aesthetic finish.

China CO2 Laser Machine Factory

Step 3: Machine Setup

Proper setup of your MYounglaser CO2 laser machine is vital to ensure precise and efficient cutting. Follow these steps for optimal setup:

  • Clean the machine: Dust or debris on the laser lens or mirrors can impact the beam’s accuracy and intensity.
  • Adjust focus: Use the machine’s focus gauge to ensure the laser is set at the correct height above the acrylic. Proper focus results in cleaner cuts and less material burn.
  • Enable air assist: Air assist directs a stream of air toward the cutting surface, removing debris and cooling the acrylic to reduce the chance of flame or scorching.
  • Ventilation: Acrylic releases fumes when cut, which can be harmful and reduce visibility. Make sure your machine’s ventilation system or exhaust is working effectively.

Step 4: Setting Laser Parameters (Power, Speed, Frequency)

The cutting quality of your CO2 laser machine greatly depends on the right combination of laser power, speed, and frequency. The settings vary depending on the machine’s wattage and the thickness/type of acrylic.

Example Settings for 5mm Cast Acrylic with 100W CO2 Laser:

  • Power: 80-85%
  • Speed: 10-15 mm/sec
  • Frequency: 5,000 Hz

For thicker acrylic, lower the cutting speed and increase the power. For engraving, increase the speed but decrease the power to prevent over-cutting.

General Rule of Thumb:

  • Higher power settings are used for deeper cuts or thicker acrylic sheets.
  • Slower speeds allow for more accurate cuts, especially for intricate designs.
  • Frequency settings typically range between 1,000 and 20,000 Hz depending on the material. For acrylic, a mid-range frequency (around 5,000 Hz) works best.

Step 5: Perform a Test Cut

Before cutting your full design, it’s crucial to run a test cut on a scrap piece of acrylic to ensure your settings are correct. This step helps avoid material wastage and provides an opportunity to fine-tune any settings.

  • Key factors to check:
    • Edge smoothness: Are the edges clean, or do they show signs of melting?
    • Cut through: Is the cut complete, or are there parts still attached?
    • Material discoloration: Has the acrylic burned or shown signs of over-heating?

If the edges are rough or the material shows burn marks, adjust the speed and power settings to achieve a smoother cut.

co2 laser cutting machine

Step 6: Cut the Acrylic

Once your machine is set up and the test cut is successful, you can proceed to cut your design. Make sure the acrylic sheet is securely placed on the machine bed to prevent shifting during the cut.

  • Monitor the process: Keep an eye on the machine during the cutting process to ensure no issues arise, such as material shifting or misalignment.
  • Adjust speed for intricate parts: If your design has intricate or small parts, consider lowering the speed further to allow for better precision.

Step 7: Post-Processing

After cutting, the edges of the acrylic might need some post-processing, depending on the level of polish you want.

  • Remove the protective film: Most acrylic sheets come with a protective film on both sides to prevent scratches. Remove it after cutting.
  • Clean the edges: You can use isopropyl alcohol and a soft cloth to remove any residue or dust left on the edges.
  • Flame polishing: For ultra-smooth and glossy edges, consider using a flame-polishing tool, which melts the edges slightly, giving them a glass-like finish.
co2 laser machine manufacturers

Common Issues and Troubleshooting

  1. Melting or Burning of Acrylic: If you notice burn marks or melted sections, reduce the power and increase the cutting speed slightly. Melting is a sign that the laser is applying too much heat.
  2. Incomplete Cuts: If the laser isn’t cutting through the entire material, increase the power or slow down the cutting speed. Also, double-check that the focus is correctly adjusted.
  3. Rough Edges: This can occur due to incorrect focus, dirty lenses, or improper power/speed settings. Clean your machine, adjust focus, and tweak the laser parameters to achieve smoother results.

By following this detailed step-by-step guide, you can harness the power of a CO2 laser machine to create high-quality acrylic designs with precision. MYounglaser’s range of CO2 laser machines is perfect for cutting acrylic, and with the right preparation and settings, you can achieve smooth, polished results for various projects. Whether you’re cutting simple shapes or intricate designs, this guide will help you maximize your machine’s potential.